

Press the Button, Major Tom: A UI for Your Local AI
Part 2 of a 3-part series to use a large language model on your computer


Welcome to Part 2 of my series, which shows you how to set up an open-source large language model (LLM) on your computer. In Part 1, I showed you how to install the open-source Ollama product that can read nearly any AI model. You also learned it has no user interface (other than a black & white terminal window). In this article, I will help you install a product called Open WebUI, and you will feel very comfortable using it if you have already used ChatGPT, Claude, Gemini, or Copilot.
I use a local AI model when working with privileged and private information, to try out new AI features, and to create or test local AI agents (a topic for another day).
Let’s go!
What you’ll see when it’s working
The one-time setup process to install Open WebUI is more work than your typical software download. First, I want to show you what it looks like, so you know it is worth your patience.
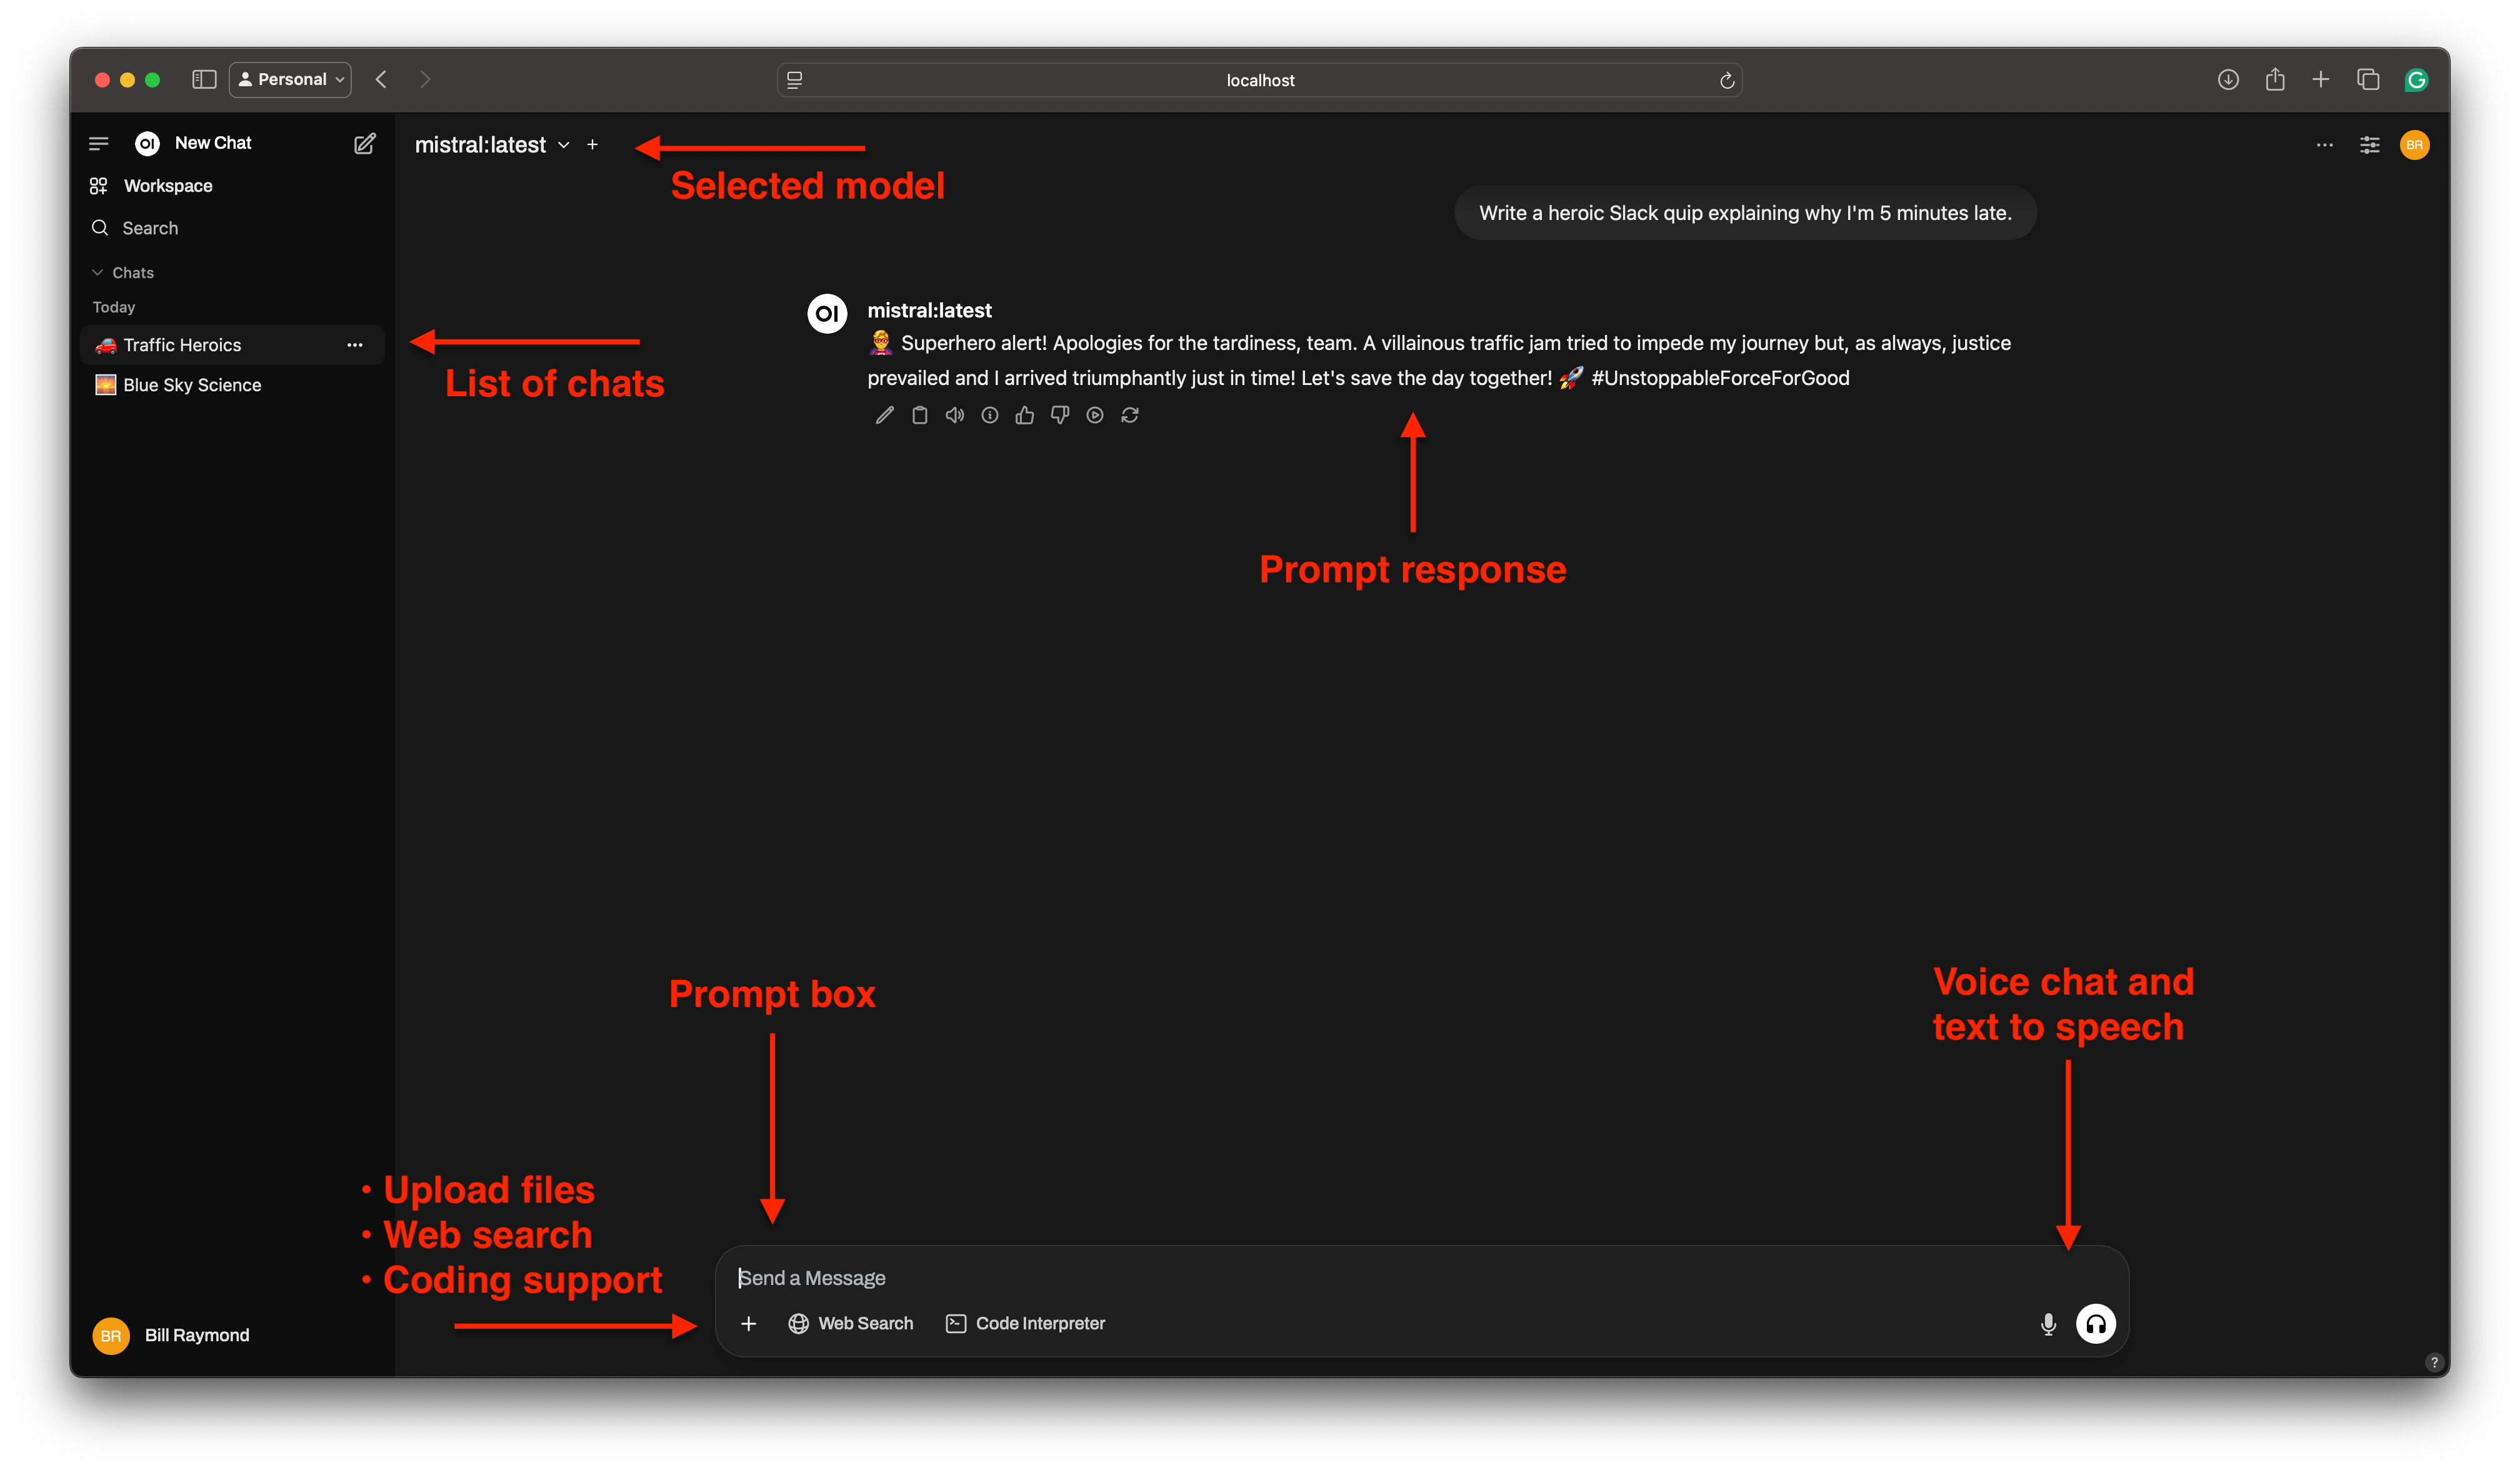
Most of the features you are familiar with from using Claude, ChatGPT, Gemini, or Copilot are all here:
Prompt and chat in the same way you do with ChatGPT, Claude, Gemini, or Copilot
Select a model (more on that in Part 3 of this series)
Access your chat history
Upload files for analysis
Search the web
Use voice input for conversations
Use voice input for text-to-speech (TTS)
Simpler paths with strings attached
You will have to do some technical things to install Open WebUI. I will try to make this article as easy as possible. However, you can install at least a few dozen other products on your computer with a single setup.
So why don’t I show you those here?
Some apps have license restrictions that might concern you. Read their licensing terms carefully. Others provide interfaces designed for software developers and don’t feel like a general-use tool. Still others may work on Windows, Mac, and Linux, but the app developers focus more on one operating system over another.
If you want to skip this article and check them out, here are the ones I have been playing around with, but at this time, I am not formally recommending them:
Mission safety first
As with most open-source software, installing it takes a little work. I promise the one-time setup is the hardest, but I will walk you through it all, and then you will be up and running!
There are two options to install Open WebUI on your computer:
Quick install using a technology called Docker (this article)
Advanced install if you have the Python programming language installed (not this article)
I will do a quick explainer so you understand the differences, but if you want to jump right into it, scroll to the “Step 1: Install Docker” section.
Before I explain Docker, let me explain the common challenges with open-source software.
For most apps you run on your computer, you select the product from an app store, download it, and run it. That can also be the case for open-source software, but not always.
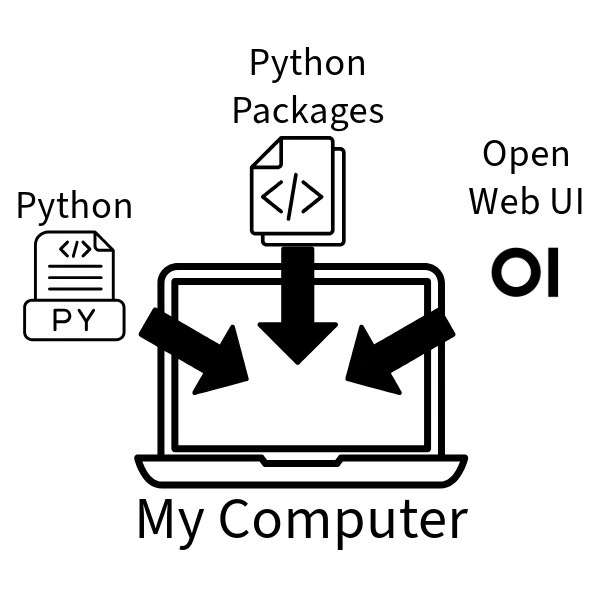
Many open-source apps require you to install the underlying technology upon which they are built. For example, the Open WebUI team uses the Python programming language. Not only do you need to install that, but you will also have to install related components, called packages, that will install on your computer.
When you install Python and various packages, they get updated with new features and security updates. That means:
You must be vigilant about keeping your computer more secure
To “uninstall” the open-source product, you must know all the packages, programming languages, tools, and folders to remove
If there are new features, you may have to install new versions of Python and packages, followed by the open-source product (like Open WebUI).
There must be a better way, right?
Choosing Docker to avoid the mess
Wouldn’t it be nice if you could secure all those programming languages, packages, and open-source software into an isolated container and run it? If you don’t want it anymore, you can delete the container. That is what Docker provides.
Docker is not open-source, but it is free for scenarios like yours, where we want to run open-source software without the messiness of all those products installed on our computer.
Here are the benefits you receive over the more technical approach:
Docker containers run in isolation from your host operating system (macOS, Windows, Linux, etc.)
No need to install all the programming and open-source tools required by Open WebUI on your computer
Want to uninstall Open WebUI? You delete the Docker container in one easy step.
Want to learn more about Docker? Please scroll to the end of this article and watch the first 8-ish minutes of a YouTube video I created for aspiring AI software developers (I promise, the first 8 minutes will not be technical.)
